Crispy Air Fryer Chicken Wings: An Easy-to-Follow Tutorial
Recipe Allstar / 1 year
February 25, 2025
0
16 min read
There’s something magical about biting into a perfectly crispy wing. The crunch, the flavor, the satisfaction—it’s a moment that brings people together. Whether it’s game day or a casual get-together, this dish is always a crowd-pleaser. And the best part? It’s easier to make than you might think.
Using an air fryer, you can achieve that golden, crispy texture without the mess of deep frying. The secret? A sprinkle of baking powder. This simple ingredient works wonders, creating a coating that’s irresistibly crunchy. Plus, it’s a healthier alternative, using less oil while still delivering on taste.
This step-by-step tutorial is designed for anyone, whether you’re a seasoned cook or just starting out. With just a few common ingredients and minimal prep time, you’ll have a mouthwatering dish ready in no time. Let’s dive in and make your next gathering unforgettable!
Key Takeaways
Simple and delicious results with minimal effort.
Perfect for game day or casual gatherings.
Baking powder ensures a crispy, golden coating.
Healthier than deep frying, using less oil.
Requires only a few common ingredients.
Introduction
Juicy on the inside, crispy on the outside—this dish is a game-changer. Whether you’re hosting a party or enjoying a cozy night in, it’s a versatile option that fits any occasion. With minimal prep and quick cooking times, it’s no wonder this method has become a favorite among home cooks.
Overview of the Recipe
This recipe is all about simplicity and flavor. Using just a handful of ingredients, you can create a dish that’s both delicious and healthier than traditional methods. The key lies in the technique, which ensures a perfect balance of texture and taste every time.
One of the standout features is the reduced oil usage. Unlike deep frying, this method locks in moisture while delivering that irresistible crunch. It’s a win-win for anyone looking to enjoy their favorite snack without the guilt.
What Makes This Method Special?
Many home cooks swear by the consistent results this method delivers. “It’s my go-to for quick, crispy wings,” says one user. The even cooking and minimal cleanup make it a practical choice for busy households.
Here’s a quick comparison of traditional frying versus this method:
Aspect
Traditional Frying
This Method
Oil Usage
High
Low
Cooking Time
Longer
Shorter
Cleanup
Messy
Easy
With its blend of convenience and flavor, it’s easy to see why this recipe has become a must-try. Give it a shot and experience the difference for yourself!
Benefits of Using an Air Fryer for Chicken Wings
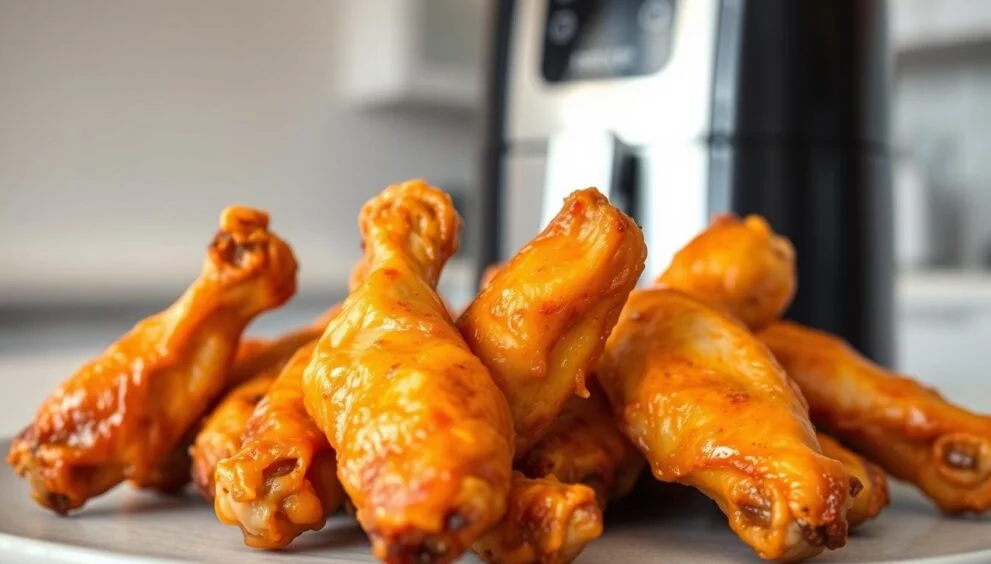
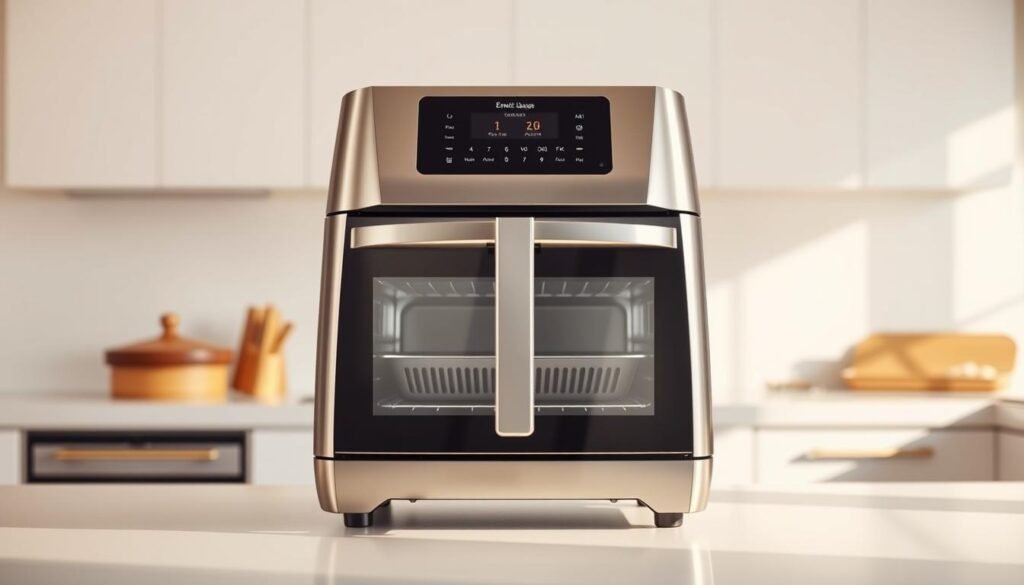
Achieving that perfect crunch has never been easier with the right kitchen tool. A wing air fryer is designed to deliver crispy results without the need for excessive oil. The circulating hot air ensures an even, golden exterior every time.
One of the standout features is the air fryer basket. Properly arranging your wings in the basket allows for optimal air circulation. This means no flipping or rotating is needed, and each piece cooks evenly. Spacing them out ensures that every bite is as crispy as the last.
Time efficiency is another major advantage. With a fryer basket, you can cook your wings faster than traditional methods. The process is also mess-free, making cleanup a breeze. Plus, the consistent results mean you’ll never have to worry about undercooked or soggy wings.
This method not only saves time but also preserves the natural flavors of the chicken. The reduced oil usage makes it a healthier option, perfect for those looking to enjoy their favorite snack guilt-free. For more tested recipes and cooking tips, explore our collection.
In summary, using a wing air fryer offers a blend of convenience, efficiency, and delicious results. Whether you’re a beginner or a seasoned cook, this tool is a game-changer in the kitchen.
Air Fryer Chicken Wings Recipe
Craving a crispy, golden snack? This method delivers perfection every time. With just a few simple steps, you’ll achieve a dish that’s both flavorful and healthier than traditional frying. Let’s dive into the details.
Start by pre-drying your wings thoroughly. This step is crucial for ensuring that crispiness you’re after. Pat them dry with paper towels to remove any excess moisture. Next, toss them with a light coating of neutral oil—just enough to help the seasoning stick.
Season generously with your favorite spices. A mix of salt, pepper, and a hint of baking powder works wonders. The baking powder helps create that golden, crunchy exterior without the need for excess oil.
Preheat your appliance to 400°F. Arrange the wings in a single layer in the basket, ensuring they’re not overcrowded. Cook for 10 minutes, then flip them over. Continue cooking for another 7-12 minutes, depending on their size. Keep an eye on them to avoid overcooking.
Here’s a quick checklist to ensure success:
Pre-dry the wings for maximum crispiness.
Use minimal oil—just enough to coat the wings.
Cook at 400°F for 10 minutes, then flip and cook for 7-12 minutes more.
Check the internal temperature with a thermometer—it should reach 165°F for safety.
Remember, the first pass might look underdone, but flipping ensures even cooking. Once done, let them rest for a minute before serving. This method guarantees a snack that’s crispy on the outside and juicy on the inside.
Essential Ingredients and Ingredient Tips
The right ingredients can make all the difference in achieving that perfect crunch. Start with fresh, high-quality components to ensure the best results. Here’s what you’ll need:
Chicken wings: Opt for fresh, not frozen, for better texture.
Kosher salt: Enhances flavor and helps draw out moisture for crispiness.
Baking powder: The secret to a blistered, crispy skin.
White pepper: Adds a subtle heat without overpowering the dish.
Neutral oil: A light coating ensures even cooking and crispiness.
Baking powder is a game-changer. It reacts with the skin, creating tiny bubbles that result in a golden, crunchy exterior. “It’s the key to achieving that restaurant-quality crispiness at home,” says one experienced cook.
When selecting oil, choose a neutral type like avocado or canola. These oils have a high smoke point, making them ideal for high-heat cooking. For salt, kosher is preferred because it dissolves evenly and enhances flavor without being overly salty.
If white pepper isn’t available, black pepper can be used, but sparingly. Its stronger flavor can dominate if overused. For consistent results, stick to these proportions:
Ingredient
Amount
Kosher salt
1 teaspoon
Baking powder
1 tablespoon
White pepper
1/2 teaspoon
Neutral oil
2 tablespoons
For more tips on selecting the best ingredients, check out our tested recipes and cooking guides. With the right components and proportions, you’ll achieve crispy, flavorful results every time.
Prepping Your Chicken Wings for Maximum Crispiness
The secret to achieving that perfect crunch lies in the prep work. Proper preparation ensures a golden, crispy exterior while keeping the meat tender and juicy. Let’s break down the steps to get it right.
Start by thoroughly drying each piece. Excess moisture is the enemy of crispiness. Use paper towels to pat them dry, ensuring no damp spots remain. This step is crucial for creating that irresistible crunch.
Next, grab a large bowl. Toss the dried pieces with a light coating of neutral oil. This helps the seasonings stick evenly. Add your spices—salt, pepper, and a touch of baking powder. The baking powder is the secret ingredient that enhances crispiness.
Here’s why this method works:
Drying removes moisture, allowing the skin to crisp up.
Using a bowl ensures even seasoning distribution.
Baking powder creates tiny bubbles for a golden finish.
For the best results, follow this step-by-step guide:
Pat each piece dry with paper towels.
Toss them in a bowl with oil and seasonings.
Arrange them in a single layer for even cooking.
This prep method maximizes the effectiveness of your appliance, ensuring every bite is crispy and flavorful. Here’s a quick comparison of prep techniques:
Technique
Result
Drying thoroughly
Enhanced crispiness
Using a bowl for seasoning
Even flavor distribution
Adding baking powder
Golden, blistered skin
With these tips, you’ll achieve a perfect balance of juicy meat and a crispy surface. Prep smart, and enjoy the crunch!
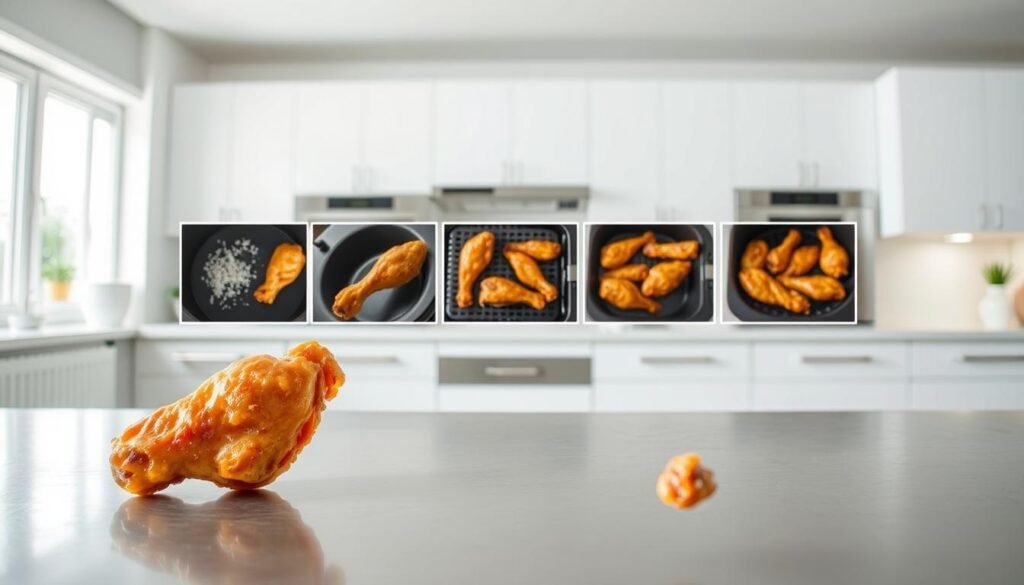
Step-by-Step Cooking Instructions
Ready to master the art of perfectly cooked snacks? Follow these simple steps to achieve a golden, crunchy delight. With a few easy techniques, you’ll have a dish that’s crispy on the outside and juicy on the inside.
Start by preheating your appliance to 400°F. This ensures even cooking from the very beginning. Arrange your pieces in a single layer, making sure they’re not overcrowded. Proper spacing allows the wing air to circulate efficiently, ensuring every bite is perfectly crispy.
Cook for 10 minutes, then flip each piece. This step is crucial for even browning. Continue cooking for another 7-12 minutes, depending on their size. Keep an eye on them to avoid overcooking. You’ll know they’re done when they reach a golden, crispy perfection.
For a visual guide, consider watching a video demonstration. It’s a great way to see the process in action and ensure you’re on the right track. Here’s a quick checklist to help you succeed:
Preheat to 400°F for optimal results.
Arrange in a single layer for even air fry circulation.
Flip halfway through for uniform crispiness.
Check for a golden exterior before serving.
Here’s a comparison of cooking times for different methods:
Method
Time
Traditional Frying
20-25 minutes
This Method
16 minutes
With these steps, you’ll achieve a dish that’s both delicious and easy to make. Whether you’re a beginner or a seasoned cook, this wing recipe is sure to impress. Happy cooking!
Adjusting Cooking Time and Temperature
Timing and heat are the keys to achieving that ideal crunch. Slight adjustments in cooking time and temperature can make a big difference, depending on the size of your pieces and the model of your appliance.
For smaller pieces, reduce the cooking time by 2-3 minutes. Larger ones may need an extra 3-5 minutes. Most models perform best at 380°F for the main cooking time. Crank up the heat to 400°F for the last 2 minutes to boost crispiness.
Monitoring progress is essential. Use a thermometer to check the internal temperature, which should reach 165°F for safety. If you notice uneven cooking, flip the pieces halfway through. Some models may require slight tweaks to achieve consistent results.
Here’s a quick guide to adjusting time and temperature:
Small pieces: 18 minutes at 380°F, plus 2 minutes at 400°F.
Large pieces: 20 minutes at 380°F, plus 3 minutes at 400°F.
Model-specific adjustments: Refer to your appliance’s manual for optimal settings.
For extra flavor, consider adding a final burst of heat. This technique locks in the crispiness while keeping the interior tender. Whether you’re aiming for a classic buffalo style or experimenting with new flavors, these adjustments ensure perfection every time.
Here’s a comparison of cooking methods:
Method
Temperature
Time
Standard
380°F
18-20 minutes
High Heat Finish
400°F
2-3 minutes
With these tips, you’ll achieve the perfect balance of a crispy exterior and a juicy interior. Happy cooking!
Serving Suggestions and Dipping Sauces
Elevate your snack game with the perfect pairing of sauces and sides. A great sauce can turn a simple dish into a flavor-packed experience. Whether you’re hosting a party or enjoying a casual meal, these ideas will make your dish shine.
Classic options like ranch and buffalo sauce are always crowd-pleasers. For a tangy twist, try a homemade BBQ sauce or a spicy garlic blend. Don’t forget to offer a variety to cater to different tastes.
Presentation matters, especially for game days or gatherings. Arrange your dish on a platter with small bowls of sauce for dipping. Add celery sticks, carrot slices, or even a side of fries for a complete spread.
Here are some creative sauce ideas to try:
Ranch with a hint of dill for a fresh twist.
Spicy buffalo sauce with a touch of honey for sweetness.
Zesty lemon-pepper sauce for a tangy kick.
Creamy blue cheese sauce for a bold flavor.
Customizing your sauce is easy. Add herbs, spices, or even a splash of citrus to create a unique blend. “Experimenting with flavors is the best part,” says one home cook. Let your creativity shine!
We’d love to hear your favorite combinations. Share your photos and vote for your top sauce online. Your feedback helps us create even better recipes for everyone to enjoy.
With these tips, your dish will be the star of any occasion. Pair it with the perfect sauce, and watch it disappear in no time!
Troubleshooting Common Issues
Even the best cooks face challenges when preparing crispy snacks. Soggy skin or uneven cooking can happen, but these issues are easy to fix with a few adjustments. Let’s dive into the most common problems and how to solve them.
One frequent issue is soggy skin. This often occurs when there’s too much moisture. To fix this, pat your pieces dry with paper towels before cooking. Proper spacing in the basket is also crucial. Overcrowding blocks chicken wing air circulation, leading to uneven results.
If your pieces aren’t cooking evenly, try flipping them halfway through. Adding a few extra minutes can also help. “A little patience goes a long way,” says one home cook. Adjusting the temperature slightly can make a big difference too.
Seasoning and wing sauce choices also play a role. A proper coating of spices ensures even flavor, while the right bbq sauce can enhance the final result. If your dish is too dry, try adding a bit more bbq or another favorite wing sauce after cooking.
Here’s a quick checklist to troubleshoot common issues:
Pat pieces dry to remove excess moisture.
Arrange in a single layer for even cooking.
Flip halfway through for uniform crispiness.
Adjust cooking time and temperature as needed.
Minor tweaks can lead to consistently great results. Whether it’s adjusting the chicken wing air flow or experimenting with bbq sauce flavors, these tips ensure your dish turns out perfectly every time. Happy cooking!
Variations and Alternative Methods
Exploring new ways to enjoy your favorite snack can be both fun and rewarding. While the classic method delivers consistent results, experimenting with variations can bring exciting flavors to your table. Whether you’re looking for a different protein or a new cooking technique, there’s plenty to try.
One popular alternative is oven-baked preparation. This method uses dry heat to achieve a similar crispiness. Simply arrange your pieces on a baking sheet, sprinkle with a bit of powder, and bake at 400°F. Flip halfway through for even browning. It’s a great option if you don’t have a specialized appliance.
For a non-meat option, consider using tofu. Marinate it in your favorite spices, coat with a light layer of powder, and cook until golden. The result is a tender interior with a satisfying crunch. It’s a fantastic way to cater to different dietary preferences.
Seasoning adjustments can also transform your dish. Adding extra powder or experimenting with spice blends like paprika or cumin can create unique flavor profiles. “A little creativity goes a long way,” says one home cook. Don’t be afraid to mix and match spices to suit your taste.
To ensure tender meat with a crispy finish, avoid overcooking. Monitor the internal temperature, aiming for 165°F. Letting your dish rest for a few minutes after cooking also helps retain moisture. These small tweaks make a big difference in the final result.
Encourage your inner chef to experiment with different cooking methods. Whether it’s baking, grilling, or trying new proteins, the core principles remain the same. With a bit of practice, you’ll discover endless possibilities to enjoy your favorite snack in fresh, delicious ways.
Conclusion
Creating a crispy, golden snack at home has never been simpler. This method offers a healthier alternative to traditional frying, using less oil while still delivering that perfect crunch. It’s quick, easy, and requires minimal effort, making it ideal for busy households or last-minute gatherings.
One of the standout benefits is the reduced fat content. By using minimal oil, you can enjoy your favorite snack without the guilt. The process is also mess-free, saving you time on cleanup. Plus, the consistent results ensure every bite is as delicious as the last.
We encourage you to give this way of cooking a try. Whether it’s for game day or a casual meal, it’s sure to impress. Share your results and let us know how it turned out. Happy cooking!
FAQ
What makes air fryer chicken wings so crispy?
The hot circulating air in the fryer creates a crispy exterior while keeping the inside tender and juicy. Using minimal oil enhances the crunch without excess grease.
How long does it take to cook wings in an air fryer?
Typically, it takes about 20-25 minutes at 400°F. Cooking time may vary slightly depending on the size of the wings and the model of your fryer.
Do I need to preheat the air fryer before cooking?
Yes, preheating for 3-5 minutes ensures even cooking and helps achieve that perfect crispiness.
Can I use frozen wings in the air fryer?
Absolutely! Just add a few extra minutes to the cooking time and shake the basket halfway through for even results.
What are the best sauces to pair with air fryer wings?
Classic buffalo, tangy BBQ, or creamy ranch are popular choices. You can also experiment with honey garlic or spicy sriracha for a unique twist.
How do I prevent the wings from sticking to the basket?
Lightly coat the basket with cooking spray or oil before adding the wings. This ensures they release easily after cooking.
Can I cook other cuts of chicken in the air fryer?
Definitely! Drumsticks, thighs, and even whole chicken breasts work well. Just adjust the cooking time and temperature accordingly.
What’s the best way to season wings for maximum flavor?
A simple mix of salt, pepper, and garlic powder works wonders. For extra kick, add paprika or cayenne before cooking.
How do I store and reheat leftover wings?
Store them in an airtight container in the fridge. To reheat, pop them back in the fryer for 3-5 minutes to restore their crispiness.
Can I make gluten-free wings in the air fryer?
Yes! Skip the flour or breadcrumbs and use gluten-free seasonings for a delicious, allergy-friendly option.